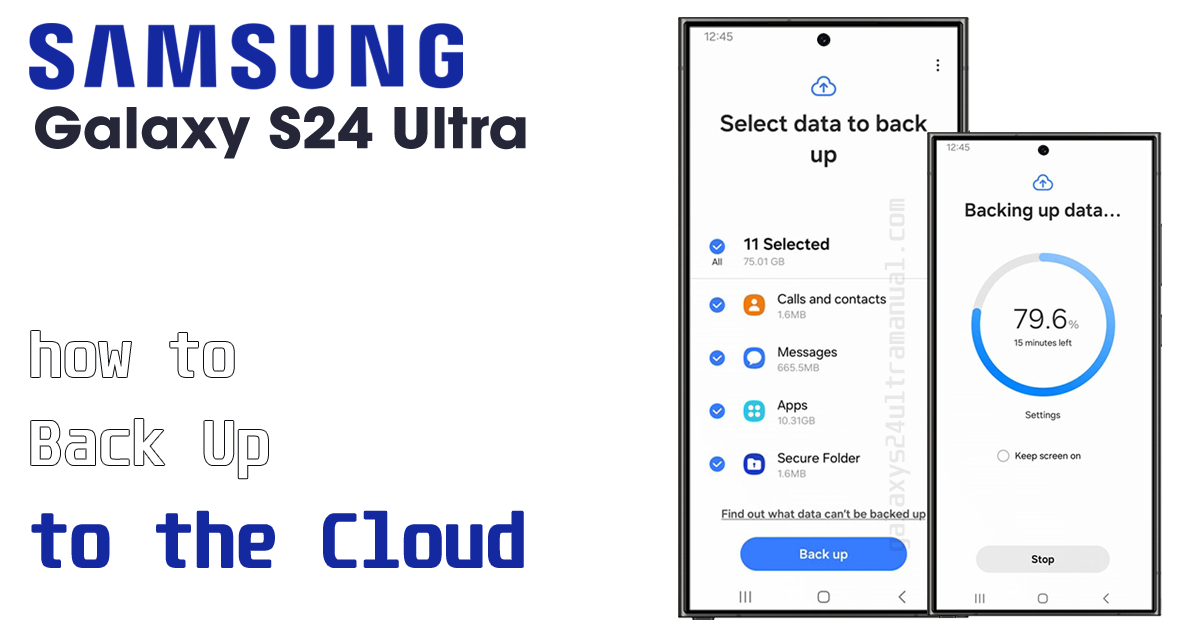
Device backups provide peace of mind and secure data copies. Imagine losing cherished photos, critical work documents, or personal contacts—a nightmare scenario for most of us. By regularly backing up your Samsung S24 Ultra, you can avoid the frustration and potential data loss that can occur due to unforeseen circumstances.
Different Methods to Back up your Samsung S24 Ultra
Samsung understands the importance of data security and has implemented various backup options for its users. With the S24 Ultra, you have the flexibility to choose from multiple backup methods, each with its own advantages and considerations. Let’s explore some of the most popular options.
How to Back up your Galaxy S24 Ultra to the Samsung Cloud
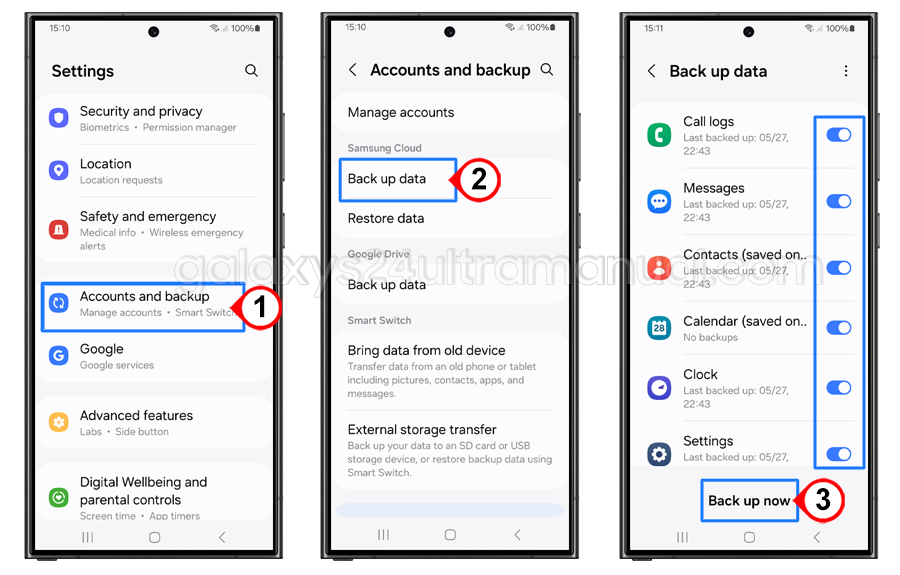
Samsung Cloud is a convenient and integrated backup solution that allows you to securely store your data in the cloud. This option is particularly useful if you frequently switch between Samsung devices or need to restore your data after a device replacement or reset. Here’s how you can back up your S24 Ultra to the Samsung Cloud:
- Open the Settings app on your S24 Ultra.
- Tap on “Accounts and Backup,” followed by “Samsung Cloud.”
- Select the data you want to back up, such as contacts, calendar events, notes, and more.
- Tap on “Back up data” to initiate the backup process.
Samsung Cloud offers a certain amount of free storage, but you can also opt for a paid subscription to increase your storage capacity if needed.
Back Up Samsung S24 Ultra to Google Drive
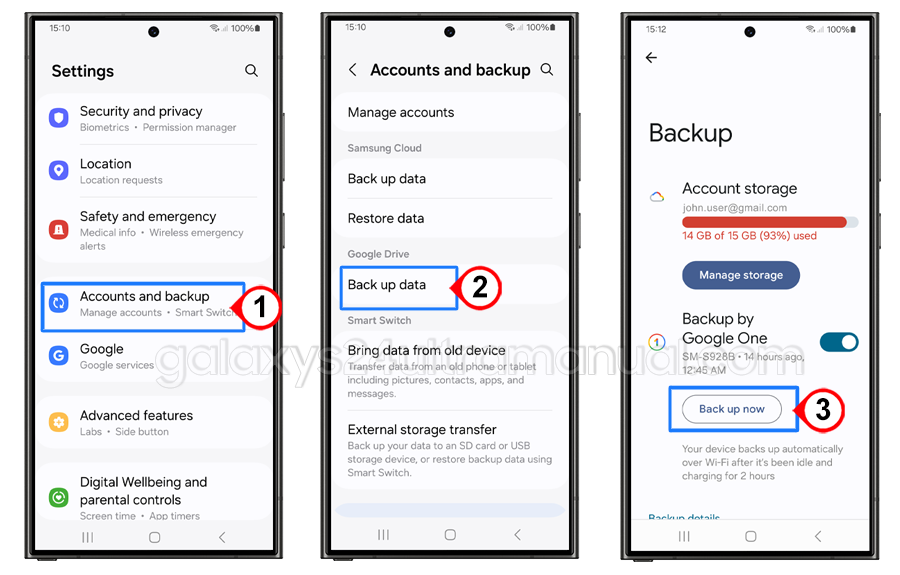
Google Drive is another popular backup option, particularly for those who heavily rely on Google services and prefer a cross-platform solution. By backing up your S24 Ultra to Google Drive, you can easily restore your data on any Android device or even access it from a web browser. Here’s how to get started:
- Open the Settings app on your S24 Ultra.
- Tap on “Accounts and Backup,” followed by “Google Drive .”
- Tap on “Back up now” to initiate the backup process.
Google Drive offers a certain amount of free storage, but you can upgrade to a paid plan if you require additional space for your backups.
Tips for a Successful Backup Process
While backing up your Samsung S24 Ultra is essential, ensuring a smooth and successful backup process is equally important. Here are some tips to keep in mind:
- Reliable Internet Connection: A stable and fast internet connection is crucial for efficient backups, especially when uploading large amounts of data to the cloud.
- Sufficient Storage Space: Before initiating a backup, ensure that you have enough available storage space on your device or in the cloud to accommodate the backup data.
- Battery Life: To avoid interruptions during the backup process, make sure your S24 Ultra has sufficient battery life or keep it connected to a power source.
- Regular Backups: Establish a routine for backing up your data regularly, whether it’s weekly, monthly, or at a frequency that suits your needs.
- Backup Verification: After completing a backup, it’s a good practice to verify that all your data has been backed up successfully.
Restoring data from a backup on your Samsung S24 Ultra
While backing up your data is crucial, the ability to restore it when needed is equally important. Samsung and Google have made the restoration process straightforward, ensuring that you can quickly get your data back in the event of data loss or device replacement.
Restoring from Samsung Cloud
If you’ve backed up your data to Samsung Cloud, follow these steps to restore it on your S24 Ultra:
- During the device setup process, select the option to restore data from the Samsung Cloud.
- Select the backup data you want to restore, such as contacts, calendar events, notes, and more.
- Follow the on-screen instructions to complete the restoration process.
Restoring from Google Drive
If you’ve backed up your data to Google Drive, here’s how you can restore it:
- During the device setup process, select the option to restore data from a backup.
- Select the backup data you want to restore, such as app data, call history, device settings, and more.
- Follow the on-screen instructions to complete the restoration process.
Remember, restoring your data from a backup may overwrite any existing data on your device, so exercise caution and make sure you’re restoring the correct backup.
Best Practices for Regular Backups
Backing up your Samsung S24 Ultra should be a regular habit, not just a one-time task. Here are some best practices to ensure that your data is always protected:
- Automate Backups: Both Samsung Cloud and Google Drive offer the option to schedule automatic backups at regular intervals, ensuring that your data is always up-to-date without manual intervention.
- Backup Before Major Updates or Changes: Before installing a software update, performing a factory reset, or making significant changes to your device, it’s always a good idea to create a backup as a precautionary measure.
- Verify Backups Periodically: Periodically check your backups to ensure that all your important data has been successfully backed up and that the backups are accessible and intact.
- Use Multiple Backup Methods: While relying on a single backup method may seem convenient, it’s recommended to use multiple backup solutions to maximize data protection and reduce the risk of data loss.
Conclusion
Our smartphones have become repositories of our lives, containing precious memories, important documents, and essential data. Backing up your Samsung S24 Ultra is a crucial step in safeguarding this invaluable information. By following the steps outlined in this article and adhering to best practices, you can ensure that your data is protected and easily recoverable in case of any unforeseen circumstances.
Remember, a backup is only as good as its restoration capabilities. By familiarizing yourself with the restoration process and regularly testing your backups, you can have peace of mind knowing that your data is secure and accessible when you need it most.


3 thoughts on “How to Back Up Samsung S24 Ultra to Save and Secure your Important Data”